Welcome to chapter 8 of our ultimate guide to building a blog series!
In the previous chapter, we have learned what types of plugins you should use on your WordPress blog.
This article builds on what you have learned so far by helping you set up the tools you need to analyze the success of your blog.
We’re talking tracking codes for Google Analytics, Facebook Pixels, Twitter conversion tracking, Pinterest Analytics and Google Search Console.
You may not want to use all of them, but chances are, you’ll use one or two of them.
By the end of this article, you will know how to add Google Analytics to WordPress, add Facebook Pixel to WordPress, use Twitter conversion tracking, set up Pinterest Analytics and use the Google Search Console.
All so you can better understand the visitors to your blog!
- What Is Website Tracking?
- Add Google Analytics to WordPress
- How to Install Google Analytics in WordPress?
- Add Google Analytics to a WordPress Theme
- Benefits of Using Google Analytics for Your WordPress Website
- Facebook Pixel and WordPress
- How to Add Facebook Pixel to WordPress?
- Twitter Conversion Tracking
- Add Pinterest Analytics to WordPress
- Adding a WordPress Site to Google Search Console
- How to Verify a WordPress Site in Google Search Console?
- Website tracking and the law
- FAQs for Adding Tracking Codes in WordPress
- Wrap Up
What Is Website Tracking?

Website tracking is a controversial subject. Websites like tracking because they can identify what visitors do on the site so they can improve the experience. Visitors don’t like tracking because it’s viewed as an infringement on privacy.
When used responsibly, tracking provides enough data to be able to identify any areas of improvement and what works and what doesn’t. Without infringing on privacy.
Done wrong, tracking causes distrust and people will begin avoiding your website for fear of being followed around the internet.
As a blog owner, tracking will help you to know who visits your site, where they come from and how long they spend on each page. You could also benefit from knowing where they went while on your site and where they went next.
That’s what website tracking gives you. Data on user behaviour.
Yes, people don’t like being tracked. But people are used to being tracked online. As long as you use minimal tracking and let them know what’s going on, they should be fine with it.
Why Websites Use Tracking?
It is estimated that around 80% of websites use some form of tracking.
Website tracking can tell you what is working on your website and what isn’t.
Whether you’re running a blog or a WooCommerce store, knowing what pages work and what pages require improvement can help direct future efforts and identify areas where you could do better.
Despite the public perception, website analytics are an incredibly important insight into how everything works.
There are different types of website tracking:
- Analytics – Tracking that can assess how a website performs. It can track the number of visitors, each visitor’s location, time on page, where they went on the site and any interactions they made while there.
- Advertising – Tracking that gathers data on location, browser, device type, IP address, social media information, website interactions and any previous visits. All designed to provide more targeted advertising.
- Personalized content tracking – Tracking that provides content based on previous interactions. Often used on news websites, sites like YouTube, Netflix or other sites that use previous behaviour to provide recommendations.
- A/B testing tracking – A/B testing is a very useful way to identify what works and what doesn’t on your blog. You can try different types of blog posts, different sizes, shapes or types of ads, different calls to action and even different sales funnels.
You can track user behaviour and analyze the results of each of these to see which work best and which don’t perform quite so well. From here you can either stick with the options that work best or refine those that won’t perform to improve them. Either way, A/B testing is a very useful method of making your website perform better.
How Websites Track You?
There are three main methods of website tracking, web beacons, tracking cookies and browser fingerprinting.
- Web beacons – Also known as Pixels or Pixel Tags are a single pixel that monitors users, IP addresses, preferences, device type, browser type and other information to track interactions on a site. They can also be used across social media and even in email.
- Tracking cookies – Tracking cookies as tiny text files downloaded to a device whenever you visit a website. They are the most common form of website tracking used by most websites. They can be as innocent as just tracking previous visits or as nefarious as following you around the web.
- Browser fingerprinting – Browser fingerprinting it used to create personalized content. It collects your device, browser, operating system, screen resolution, chosen language, time zone and even what fonts you use. All collated into an identifiable fingerprint used to provide personalized content whenever you visit that website.
Now you have an idea of what tracking is and how it benefits website owners, let’s take a look at how to add the various codes to WordPress.
Add Google Analytics to WordPress
Google Analytics is probably the most common website tracking tool around. It forms part of Google’s massive webmaster tools suite and is free to use if you have a Google Account.
What Is Google Analytics?
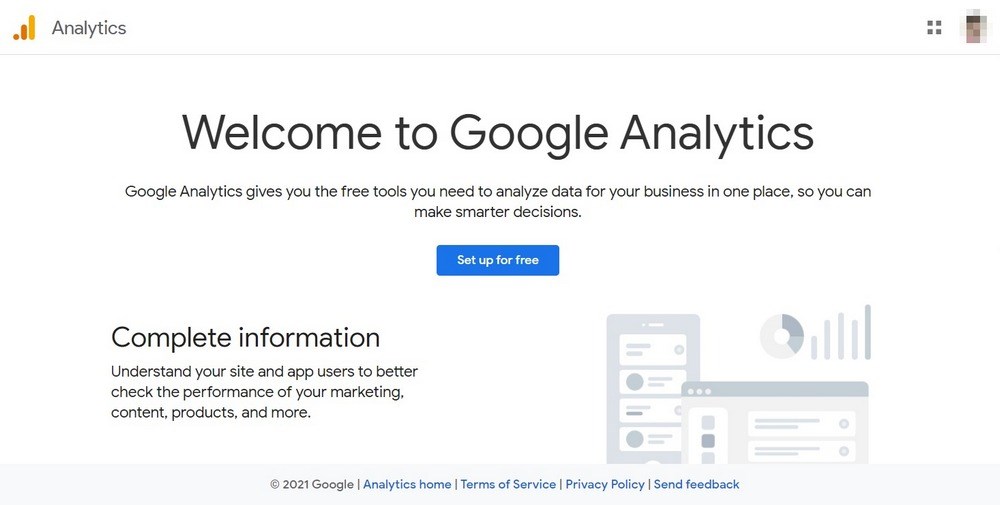
Google Analytics is a very powerful tool that analyzes visitors to your website. It tracks where they live, what browser they are using, the screen resolution being used and what they do while they are on your site.
Google ensures that its analytics tools are compliant with most data protection laws so you should avoid any liability if you use Google Analytics.
How to Sign up With Google Analytics?
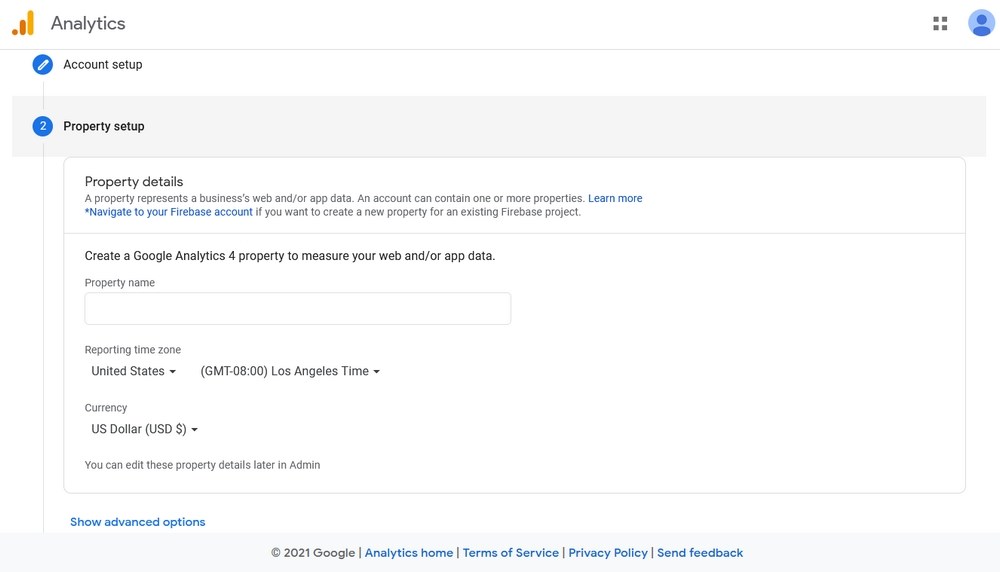
If you already have a Google or Gmail account, you can sign up immediately with Google Analytics.
- Step 1: Create a Google Analytics Account – Follow the link, select Start Measuring and fill in the form. Use any name for the Account as this is internal only. Then select Next.
- Step 2: Set up a Property – Websites are referred to as a Property. Once you complete the basics above, you will be presented with a Create Property page. Complete the form adding your blog URL, country, time zone and other applicable information. Then select Next.
- Step 3: Finish the Setup – Enter information about your business if desired and select I Accept next to the terms and conditions.
- You are now signed up to Google Analytics.
- Now it’s time to get the tracking code.
- Step 4: Get Your Google Analytics Tracking Code – The tracking code is how Google identifies your blog and links it to your Google Analytics dashboard so you can see what’s going on.
Once you agree to the Google terms, you should be presented with the tracking code page. You should see a Tracking ID at the top and a section called Global Site Tag (gtag.js) with code underneath.
Keep that page open in a browser tab as you’ll need it in a minute.
How to Install Google Analytics in WordPress?
To fully utilize the power of Google Analytics, we need to add the tracking code to your website.
There are a couple of ways to do this. You can use a plugin, use a headers and footers plugin, add it to a compatible WordPress theme or use the Google Tag Manager.
Insert Google Analytics Code Using a Plugin
There are a number of plugins you can use to add the Google Analytics code to your website.
We recommend one of these three:
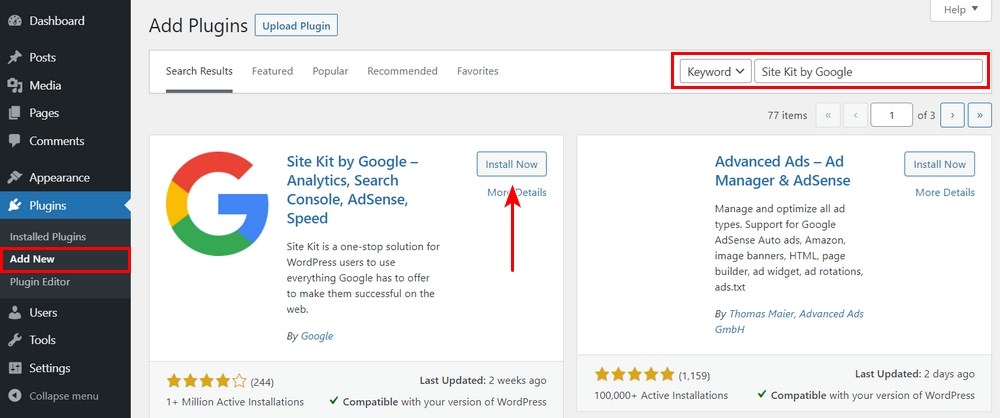
We’ll use Site Kit by Google as an example. You can download it directly from Google or from the WordPress Add Plugins window. Either way, once you install and activate it, you just need to link it to your Google Account for things to begin working.
Once installed, Site Kit by Google will begin tracking activity on your website and start reporting back to the Analytics dashboard.
Insert Google Analytics Code Using Insert Headers and Footers Plugin
Some headers and footers plugins support Google Analytics. They aren’t as powerful or track as much as other plugins but can still get the job done.
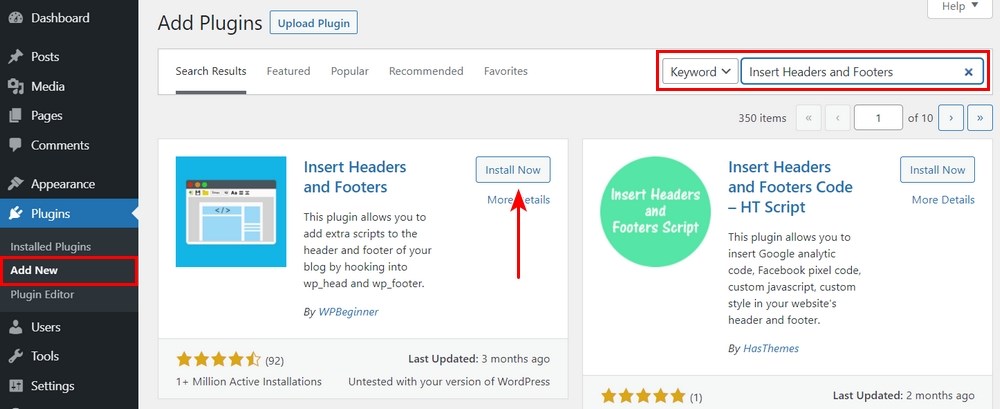
The Insert Headers and Footers plugin from WPBeginner is a good example. It enables you to add scripts to your headers and footers for many reasons. One of which could be Google Analytics.
Let’s use it to install the Google Analytics code into WordPress:
- Install the plugin and activate it
- Select Settings and Headers and Footers from the left pane of the WordPress dashboard
- Copy your Google Analytics code from your Analytics dashboard and paste it into the Header section of the plugin
- Save your changes
That’s all there is to adding Google Analytics using a headers and footers plugin!
Add Google Analytics With Google Tag Manager for WordPress
Google Tag Manager is another tool from the search giant that aims to help websites use its tracking tools. It doesn’t just work with Google Analytics. It can also work with other tracking tools such as Facebook Pixel.
You can use a plugin to help with this. We like Google Tag Manager for WordPress.
Google Tags are not the easiest to use or inject into a website but this plugin makes it simple.
- Sign up to Google Tag Manager here
- Complete the form, add your URL and finish setup
- Keep the Google Tag Manager Container ID open in a browser tab
- Install and activate Google Tag Manager for WordPress
- Select Settings and Google Tag Manager for WordPress from the left menu
- Paste your Google Tag Manager Container ID and configure any additional options
- Select Save
Add Google Analytics to a WordPress Theme
Many WordPress themes support the use of Google Analytics, including Astra. Some will have a specific tool within theme settings while others support adding the code to the header.
Astra works using the latter. You can use the Custom Layouts module or the Astra Hooks plugin to add Google Analytics to your blog. Both require Astra Pro but make short work of adding the code to your WordPress theme.
Let’s use Astra Hooks for this example:

- Select Appearance and Customizer from the left of your WordPress dashboard
- Select Hooks and Header from the selection in the Customizer window
- Paste your code into the wp_head section on the left
- Select the blue Publish button to save and activate
That’s all there is to it. Your website should now begin generating data from that moment on.
Benefits of Using Google Analytics for Your WordPress Website
We touched earlier on why website tracking is useful, but it might be a good idea to go into it in a little more detail.
Here are just a few benefits you get from using Google Analytics:
Know Traffic Sources
Knowing who lands on your blog and where they come from can be useful for a few things. It can influence the language you use, the type of content you post and what devices you support through being responsive.
Knowing where visitors come from helps you localize your content. For example, if you find most of your visitors come from Europe, you can aim your content for European visitors. If visitors mainly come from the US, you can use US-English and post more US-centric content.
The language you use and type of content can be heavily influenced this way.
Know what devices visitors use can influence how and where you prioritize responsive design. If it’s mainly desktop users who visit, you can use basic responsive design. If it’s mainly mobile users, you need to put much more effort into being responsive.
How People Find Your Website
Knowing where visitors come from is also useful to know. They can arrive via search engines, paid ads, links from other websites or from social media. Knowing what works best for you can help you prioritize that source for your blog.
For example, if most of your visitors come from search, you can prioritize organic SEO to help your position in search. If most visitors come from paid ads, you can prioritize Google AdWords to get more visitors.
Understand Your Audience
In this context, understanding your audience means knowing how they interact with your website. Tracking can tell you what pages are visited most, who clicks on what link on your pages and what calls to action and other interactions work best.
By identifying what pages and what links get the most interaction can help guide future content. If one particular type of content works exceptionally well and others not so much, publishing more of the best-performing content should keep your visitors coming back for more.
Check Conversions and Sales
Having data on conversions and sales can help your entire sales process. If one product or service sells better than another, you can adapt your approach to help those other products sell better.
If one type of call to action or sales funnel works better than others, you can tweak poor performing ones to work more like the successful one.
Improve User Experience
Knowing how long someone spends on a page and whether they stay on your site for any length of time can tell you a lot about the user experience. It won’t tell you what is wrong but it will tell you that something is wrong.
Lots of time on page or pages per session means your website is delivering a positive experience.
A high bounce rate, short time on page or very few pages per session means there is something wrong.
Know Best and Worst-Performing Pages
If some pages get a lot of visitors and others not so many, you can use that to tweak your content schedule. Using other data from Google Analytics, you can see where visitors are from and tune content to them. You can see what pages work best and publish more content like that.
Conversely, if you have pages that receive very little action, you can adjust and improve them as necessary.
Determine the Peak Visiting Hours
Knowing the time of week and day most visitors land on your website can influence when you post new content. Delivering content just before these peak times means regular visitors always get the latest news, gossip or goings on.
Facebook Pixel and WordPress
While not as popular as Google Analytics, Facebook Pixel is an incredibly popular method of website tracking. Given the size and scope of Facebook and the popularity of Facebook ads, tracking activity is essential.
If you advertise on Facebook, you need to add Facebook Pixel to WordPress!
What Is Facebook Pixel?

Facebook Pixel works in a similar way to Google Analytics. It’s a code placed on a page that links back to your Facebook account and tracks conversions, activity and more.
It uses cookies to track users on your website and any interactions they have with Facebook ads. The idea is to provide insight into how well your Facebook ads are performing so you can continually refine and improve your campaign.
Why Is the Facebook Pixel Important?
If you’re spending money on Facebook advertising, you want to know you’re getting maximum value out of that spend. You also want to be sure your ads are performing at their best. Both of which can be done using Facebook Pixel.
You can add Facebook Pixel to your blog even if you aren’t using Facebook ads. It will collect a certain amount of user data you can use when you do begin using ads.
Like Google Analytics, Facebook Pixel is legally compliant in the regions it is usable in.
How to Add Facebook Pixel to WordPress?
You can add Facebook Pixel to WordPress manually or use a plugin. Both provide the same results.
How to Add Facebook Pixel to WordPress Manually?
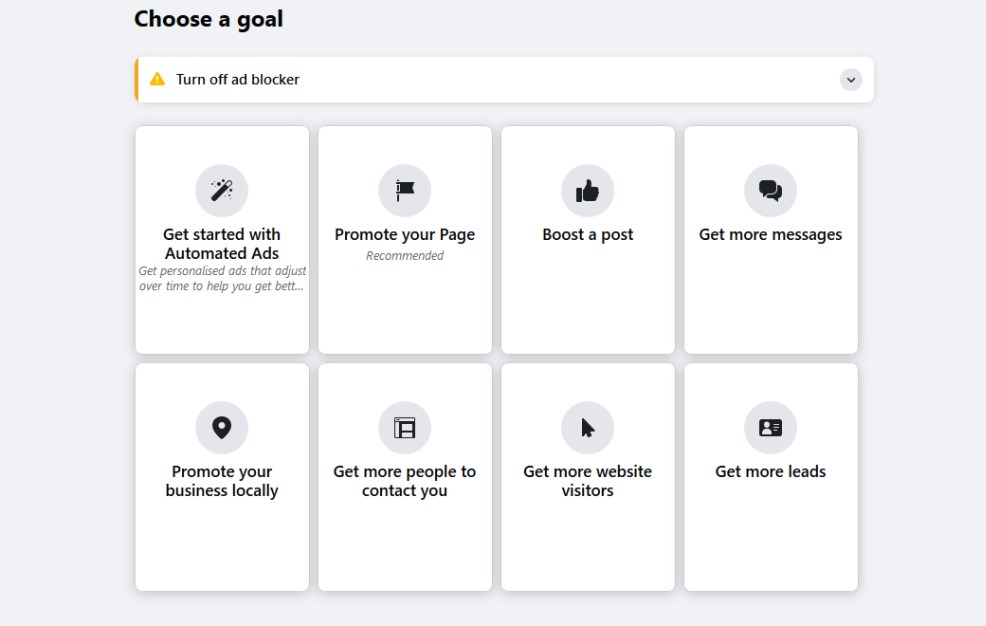
It only takes a few minutes to add Facebook Pixel to WordPress using the manual method.
- Log into Facebook and visit the Ad Manager page
- Select Create a Data Source in the centre of the page
- Select Web and Get Started
- Select Facebook Pixel and Connect
- Name your pixel and enter your website URL to check its validity then select Continue
- Select the option to manually install the Facebook Pixel and keep this page open in a browser tab
- Log into WordPress
- Select Appearance and Theme Editor
- Select the header.php file from the menu on the right
- Copy your Facebook Pixel code and paste it before </head>
- Save the change
You have now successfully installed Facebook Pixel into WordPress!
From that moment on, you will be generating data on visitors. If you’re not using Facebook Ads, this will be stored until you do. If you already use ads, you can use the data to refine your campaigns.
How to Add Facebook Pixel to WordPress Using a Plugin?
If you don’t want to mess around with header.php, you can use a plugin to add Facebook Pixel to WordPress.
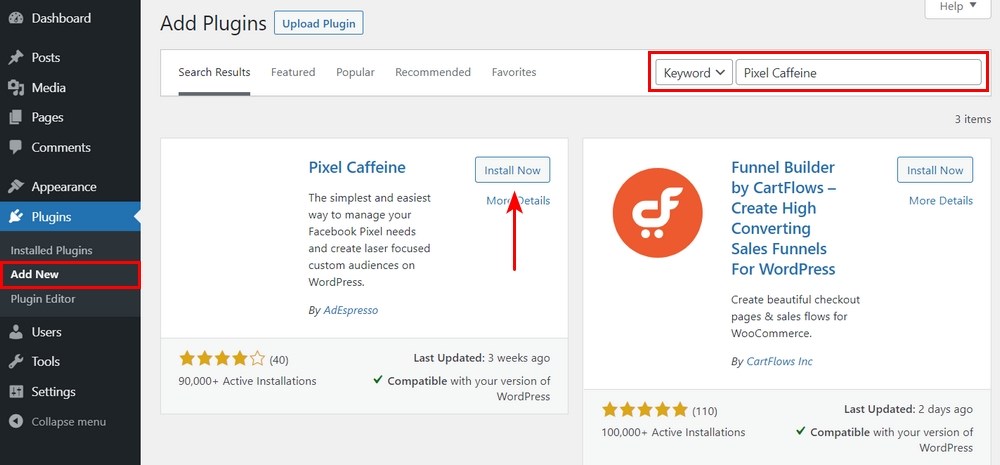
We like the Pixel Caffeine plugin for this.
- Select Plugins and Add New within WordPress
- Search for ‘pixel caffeine’ at the top right
- Select Install Now and Activate once available
- Select Pixel Caffeine from the left menu of the WordPress dashboard
- Select General Settings and select Facebook Connect
- Give the plugin permission to link to your Facebook account
- Select the correct account and Pixel ID from the dropdown menu in the plugin
- Scroll down the General Settings page to complete any other settings you may want to use
- Select Apply to save your changes
That’s all there is to adding Facebook Pixel to WordPress. Now you can track data within the Facebook Events Manager to see who does what on your website.
Twitter Conversion Tracking
Not content to let Facebook make all the ad revenue from social media, Twitter wants in on the action too. In order to track the success of your ads, or identify areas of improvement, we need to know how those ads perform.
Enter Twitter Conversion Tracking.
What Is a Twitter Website Tag?
The Twitter Website Tag is the network’s answer to the Google Analytics code or Facebook Pixel. It’s the code you place on a page that helps Twitter identify the ad account and provide useful analytics.
It works much the same as Google and Facebook too.
Add it to a page, link it to Twitter and the platform will begin tracking and reporting once data begins to appear.
Why Is Twitter Conversion Tracking Important?
Twitter Conversion Tracking is important for the same reasons as Google and Facebook. If you’re spending money on ads, you want to know you’re getting the best value and will want to identify what’s working well and what isn’t working so well.
You can then use this data to refine your approach to help improve the overall performance of your ads.
How to Install the Twitter Website Tag in WordPress?
The simplest way to add the Twitter website tag in WordPress is to use the same Insert Headers and Footers plugin from WPBeginner we used before.
- Log in to your Twitter Ads account
- Complete the form to sign up for ads
- Select Tools and Conversion Tracking
- Agree the terms and conditions for tracking
- Select the code presented on the next page and copy it
- Select Settings and Headers and Footers from the left pane of the WordPress dashboard
- Paste the code into the Footer section of the plugin
- Save your changes
- Return to the Twitter Ads page and select Conversion and Create New Conversion Event
- Complete the event form setting the criteria for tracking and the actions you want to track
This page has all the information you need for setting up conversion events in Twitter.
Once done, your website will begin generating data on any visits from Twitter ads. It will be accessible from your Twitter Ads dashboard.
Add Pinterest Analytics to WordPress
If you use Pinterest for marketing or want to track how users interact with Pinterest posts on your blog, you can do that with Pinterest Analytics.
It’s a similar system to Facebook but slightly more limited in scope. You will need a business account on Pinterest for this to work but otherwise, the entire process is very straightforward.
What Is Pinterest Analytics?
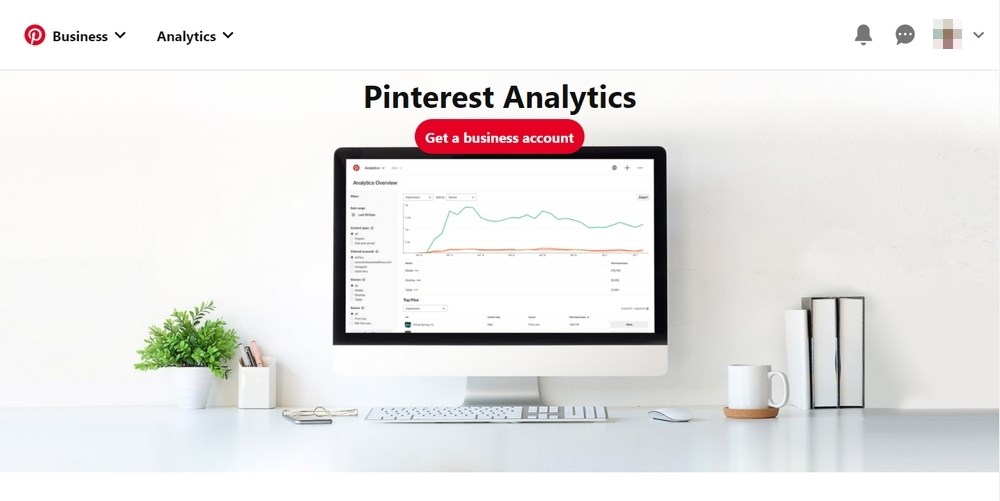
Pinterest Analytics is the social network’s tool for tracking impressions, pin selections, repins, clicks, top pins, top boards and the full range of interactions possible within Pinterest.
If you’re using Pinterest for business, these interactions give similar insights as Facebook or Google. The opportunity to look at how people interact with your pins, boards and blogs and customize your approach to better leverage what works.
Why Is Pinterest Analytics Important?
If you link your blog to Pinterest, knowing what pins work, what gets the most attention and what doesn’t will help your content strategy immeasurably.
You will want to post more content that gets the most pins and revise the content that doesn’t get so many.
How to Install Pinterest Analytics in WordPress?
We’ll use the Insert Headers and Footers plugin from WPBeginner again here as it makes short work of setting up Pinterest Analytics.
- Log in to Your Pinterest Account and sign up for a business account
- Select Profile Option and Confirm Website
- Copy the meta tag in the popup box
- Select Settings and Headers and Footers from the left pane of the WordPress dashboard
- Paste the code into the Header section of the plugin
- Save your changes
- Wait for the confirmation email from Pinterest confirming your account
- Select the three dot menu icon at the top right of your Pinterest account page
- Select Analytics from the menu
- Select your blog at the top right
All the analytic data collected so far will appear in the centre of the page.
Confirmation can take a little while so if you don’t see any data in the window to begin with, don’t worry. Just check again later.
Adding a WordPress Site to Google Search Console
Google Search Console is another useful tool for understanding how your blog performs. This tool is less about user behaviour and more about website performance.
Google Search Console can track errors, indexing issues and security issues on your website so is well worth using.
What Is Google Search Console?
Google Search Console is a free tool offered by Google to anyone that owns a website and has a Google account. This tool is more interested in how your site performs and how it performs in search.
It’s more about SEO than users and is very important to keep an eye on if you want your blog to be successful.
Benefits of Using Google Search Console
Google Search Console provides insights on who visits your website, when and where from, what they searched on if they landed from a search engine, what device and browser they are using and so on.
It also provides metrics on how fast pages load and general website performance, inspects links for errors and provides very detailed insights into everything to do with your website.
How to Verify a WordPress Site in Google Search Console?
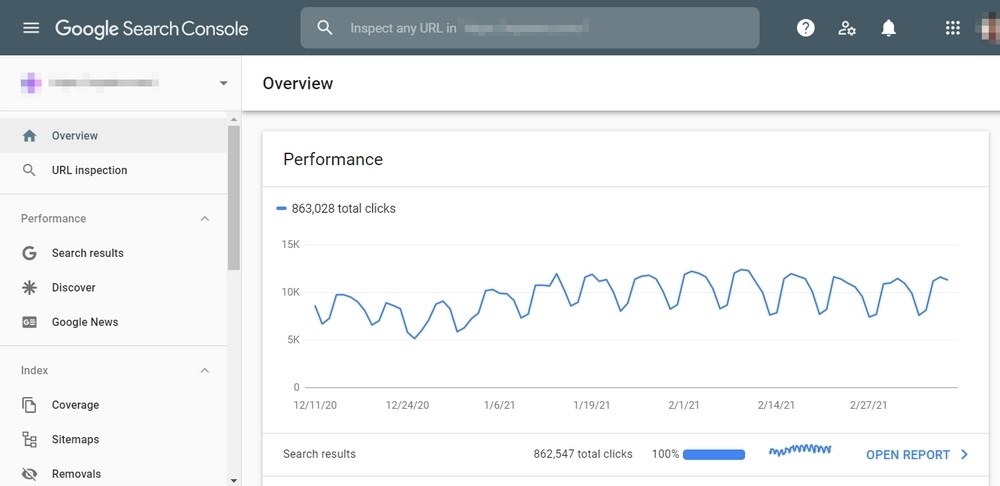
You need to verify that you own a website before you can link it to Google Search Console.
You can do this using the Headers and Footers plugin or by linking to it through Google Analytics.
The method is very similar to how we added other tracking codes in this guide.
Verify a WordPress Site in Google Search Console
Verifying a website using a plugin is very straightforward.
- Log in to Google Search Console
- Add your blog’s URL and select continue
- Select to confirm using an HTML tag
- Copy the HTML code in the window
- Select Settings and Headers and Footers from the left pane of the WordPress dashboard
- Paste the HTML code into the Header section of the plugin
- Save your changes
- Go back to Google Search Console and select Verify
- You should now see a popup window with ‘Ownership Verified’. Select Done and you’re good to use all the many tools within Google Search Console.
If you don’t see the message, clear any WordPress caching plugins you use and retry.
Verify a WordPress Site in Google Search Console Through Google Analytics
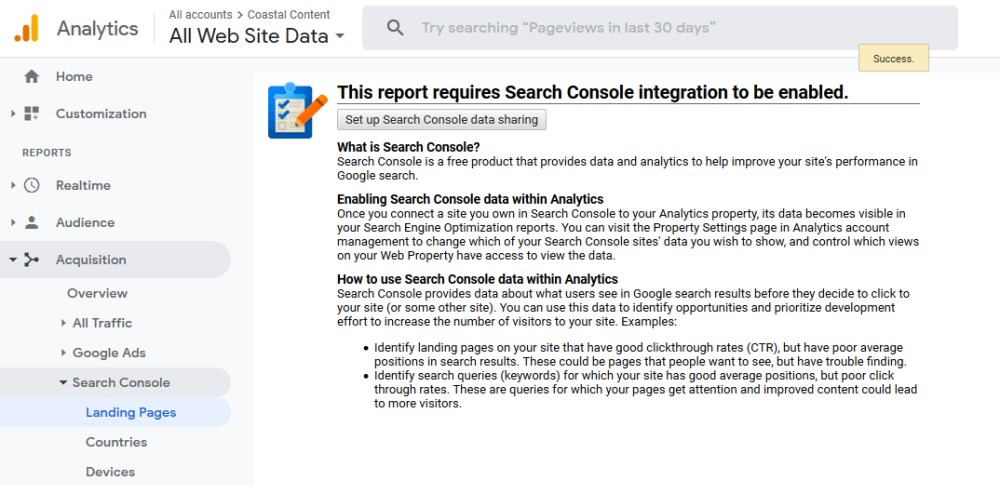
If you set up Google Analytics earlier, you can also use that to link Google Search Console. It saves having to verify ownership of the website as you have already done it.
- Log into Google Analytics
- Select the cog at the bottom left to access Administration
- Select Property Settings from the new window
- Scroll to Search Console and select Adjust Search Console
- Select Add and select your blog from the new window
- Select Save once done
- Confirm the link between Google Search Console and Google Analytics when prompted
To view Google Search Console in Google Analytics, go back to the main page and select Acquisition from the left menu.
Select Search console and select a report from the dropdown list that appears. You should now see empty graphs ready to collect and show the data collected as it appears.
Website tracking and the law
Is it legal to track visitors to your website? Yes it is if you do it properly. Using tools like those in this article are perfectly legal. Each service works within various laws like GDPR, CCPA and so on.
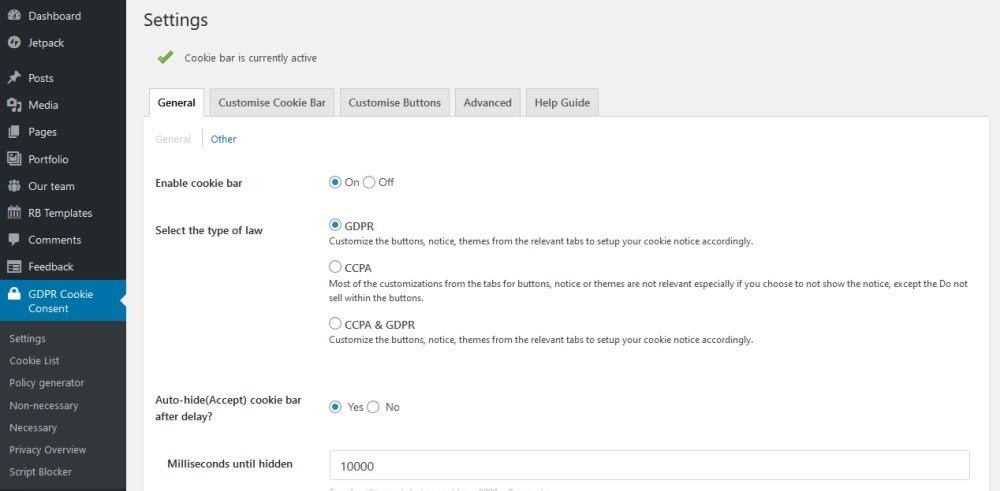
That said, it is widely accepted to be best practice to warn new visitors that your website uses cookies. There are some plugins that can do that for you. Some are serious while others add a little humour to take the edge of the annoyance of the cookie warning.
The U.S. doesn’t yet have specific user tracking laws but the Federal Trade Commission Behavioral Advertising Principles does have guidance on the subject.
California has its own tracking regulations, CCPA, as linked above.
Other regions of the world likely have their own local or national regulation around tracking and storage of user data.
As long as your tracking ensures end user privacy and conforms to your local data protection laws, you should be fine.
The tools in this guide are compliant with most laws regarding data collection and tracking on the web. Each organization works hard to design their systems to be compliant so you don’t have to worry too much about using, analyzing and keeping data.
If in doubt, get legal advice!
FAQs for Adding Tracking Codes in WordPress
We see quite a few questions being asked around tracking codes and WordPress so we thought we would try to answer a few of them here.
How do I add code to WordPress footer?
You can add a code to the WordPress footer using a plugin or by adding it manually. We use the Insert Headers and Footers plugin from WPBeginner. You can add a code to your WordPress footer manually by going to Appearance > Theme Editor > Footer.php and adding the code before the closing code. Then save and you’re good to go!
How do I add tracking code to my website?
You can add a tracking code to your website using WordPress plugins, manually by editing header.php or footer.php or by using your WordPress theme. Some themes have specific entries for Google Analytics while Astra has specific tools for adding code to the header or footer.
Where is the footer code in WordPress?
You can find the footer code in WordPress in footer.php. Be careful when editing this file as it can change how your footer looks and behaves. Adding code to your footer is simply a matter of copying the code from the platform you’re using and pasting it into footer.php before the closing tags. Save the changes and the code should begin working immediately.
How do I get a tracking code?
You can get a tracking code directly from the platform you want to use. Sign up to Google for Google Analytics and Google Search Console, sign up to Facebook for Facebook Pixel, Pinterest or Twitter for their code and so on.
Once you have the code, follow the directions in this guide to add it to your WordPress website. It’s easy!
What does a tracking code look like?
A tracking code looks like a piece of code. It won’t make much sense unless you know how to read it and it doesn’t have to. As long as you copy the entire code from the platform and paste it in the correct place, it should work fine. Most platforms that use tracking codes provide a simple copy and paste option to help you place the code on your website.
Wrap Up
There you have it, a complete guide to adding the most common tracking codes in WordPress.
Whether you use Google, Facebook, Twitter or Pinterest, adding the codes necessary to begin tracking users on your website is simple. Once done, you can begin building a clear picture of where your website performs best and where it could do with some help.
All that data should help you build a more successful blog that works better for you and delivers the experience your visitors want.
Join us next time for chapter 9: Blog Content Strategy!
Do you use web tracking on your blog? Do you find it useful? Do you implement insights into your writing? Tell us about your experiences below!


