In an Ask Your Target Market survey from 2016, it was reported that 25% of people who have made a restaurant reservation did so online. About half of those respondents said they use online reservation systems on a regular basis, too.
According to the survey, guests also indicated that they prefer online restaurant bookings over, say, calling a restaurant or using a mobile app. 47% said it’s because it’s much easier to do online. In fact, 34% of consumers admitted that they would choose a particular restaurant over another if it offered the option to book a table online.
With such strong support from consumers and with reservations giving a restaurant a clear edge over the competition, it’s clear what needs to be done.
How to Add a Restaurant Reservation System to Your WordPress Site?

If your restaurant clients rely on reservation companies like OpenTable, Yelp, and Resy to take and manage reservations on their behalf, you should strongly recommend they rethink that decision. After all, those are costly investments that don’t always have the restaurant’s best interests in mind. Not only do they make you fight for consumers’ attention by listing your website besides the competition, but the site is devoid of the restaurant’s branding.
While these systems do help restaurants fill empty seats, they’re not the only option available.
We would argue that building a restaurant booking system into your own WordPress website is ideal. Not only will consumers be able to learn more about your restaurant, look up location specifics, and even scope out the menu, now they will be able to make a reservation on the spot.
Here’s how to set this up:
Step 1: Use a Restaurant WordPress Theme
To lay the right foundation for your client’s restaurant website, you should use a WordPress theme that includes all the essentials.
Take, for instance, the Astra theme. Not only is this theme ridiculously fast and easy to use, but it comes with a number of starter templates (available through the Starter Templates plugin) that have done most of the work for you.
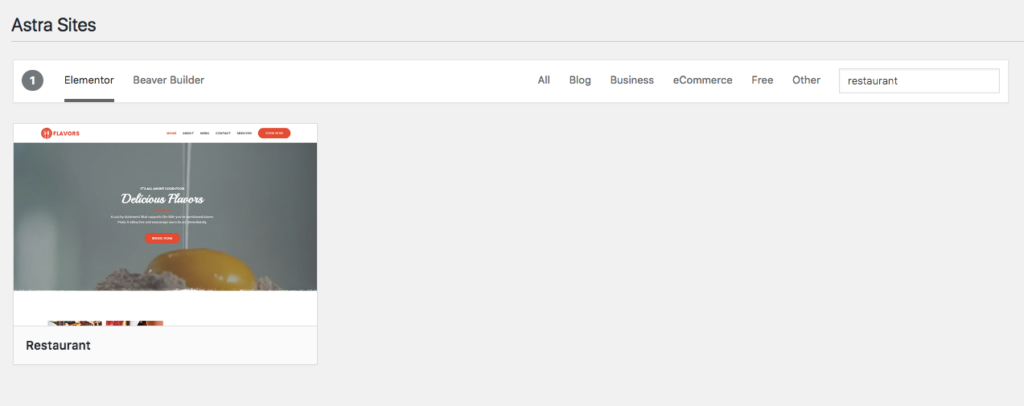
Astra’s list of starter templates includes a Restaurant theme and full template for you to use. Here’s how it looks out of the box:
As you can see, it includes all of the elements you would need:
- An enticing video background
- Information on the restaurant
- A downloadable menu
- Contact information and form
- Google map integration
Using this theme also means easy development and design, too, as it integrates with two of high-quality page builder plugins: Beaver Builder and Elementor.
Step 2: Install a Restaurant Reservation Plugin
Once you’ve built, customized, and finalized your restaurant website, you now need to add a reservation system to get the most out of it.
There are a number of WordPress booking plugins you can use to do this:
- Booking Calendar
- Bookly (this options makes the most sense if your client base relies heavily on taking reservations or booking appointments directly through their sites.)
- Booking and Appointment Plugin for WooCommerce
But your best bet here — especially if you want to effectively replace third-party reservation systems–is the Restaurant Reservations plugin. It’s free, easy to use, and enables you to manage all your bookings right from within WordPress.
Step 3: Configure the Restaurant Reservations Schedule
For the most part, any restaurant reservations or bookings plugin is going to work the same way. Premium plugins, of course, will come with advanced features, but if you need a simple solution to start, one of the free alternatives will work just fine.
Here is what you should pay attention to while configuring the Restaurant Reservations plugin:
Upon activation, there will be a new menu in WordPress called Bookings. The first thing to do is configure the Settings:
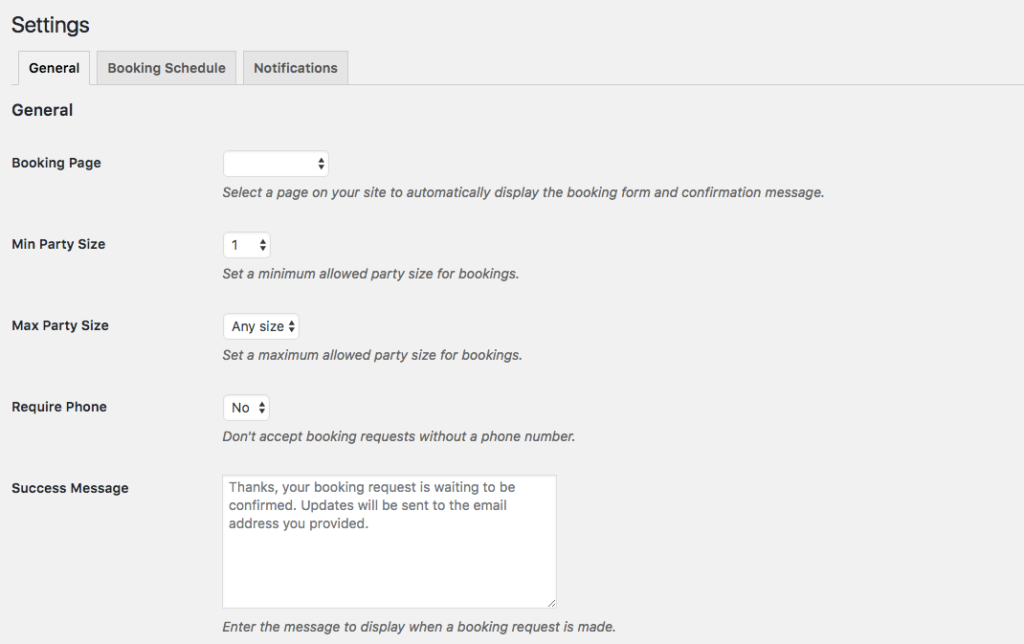
Here you can:
- Define which page will be the Reservations page.
- Set a minimum and maximum party size.
- Require a phone number be included.
- Customize the success message guests receive.
- Set the date, time, and language of the form.
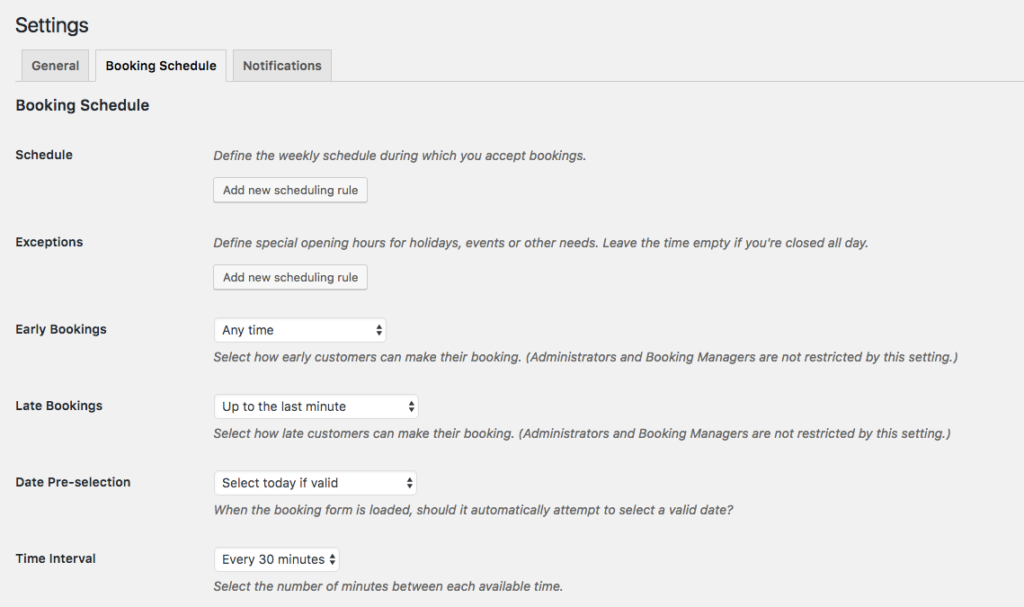
You will also need to define booking availability as well:
- Set the days of the week and time frames during which reservations can be made.
- Set special rules for holidays.
- Set restrictions on how last-minute reservations can be made.
- Insert intervals in between each reservation slot.
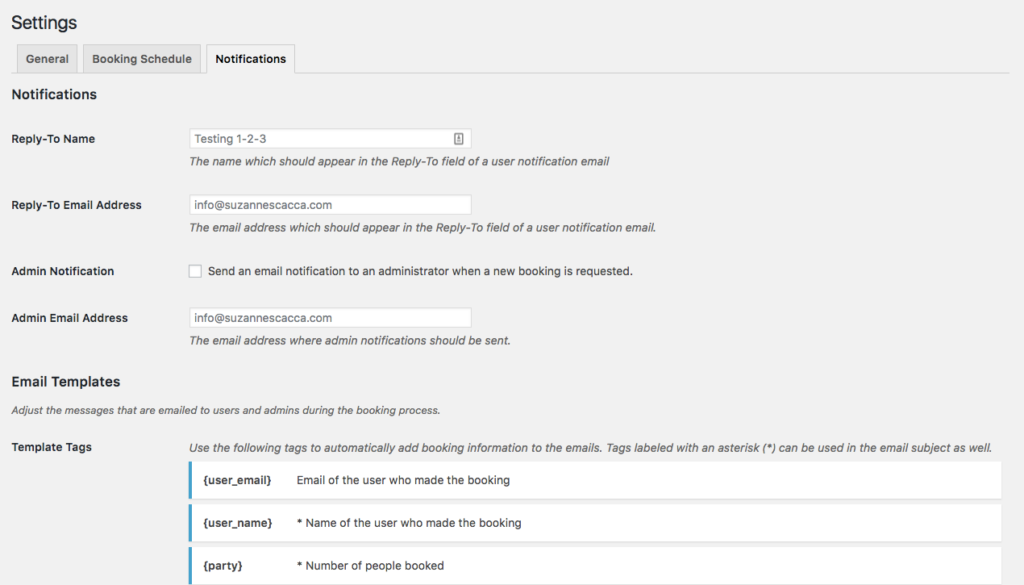
Also, be sure to write personalized notifications. You don’t want guests to be excited about dining with the restaurant, only to encounter a default WordPress message thanking them for registering.
Step 4: Add the Reservations System to the Website
Finally, you will need to add the reservations system to your WordPress site. With this plugin, in particular, it is going to generate a form on the page you previously designated. For the purposes of this example, I have placed that form on my new Reservations page:
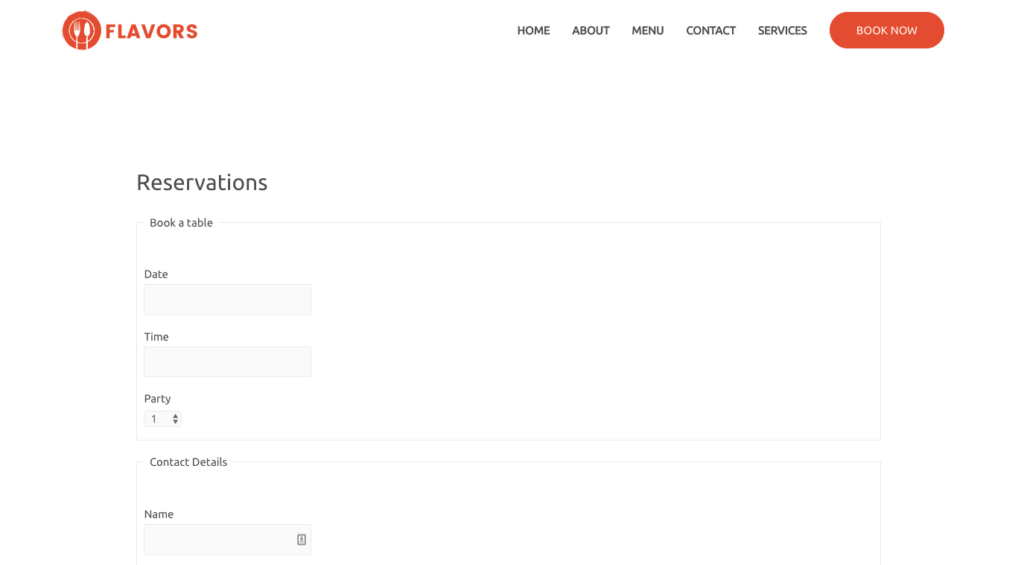
Give it a test. You’ll find that the Date and Time fields are now configured to only accept days of the week and times of the day that you defined. Then submit the form when you’re done. If everything looks exactly as you hoped–including the reservation confirmation message–then you’re almost done.
You have two choices now in terms of how you want to add this page to the site:
1. You can connect the form to the “Book Now” button which is part of the Astra Site template:
To do this, go to the Appearance menu and click on Customize.
Select Layout > Primary Header.
Under Custom Menu Text/HTML, you will see something that looks like this:
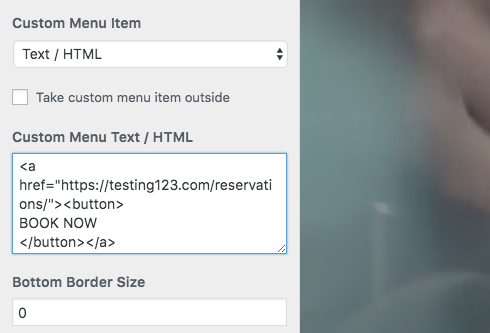
Insert the link to your Reservations page within the href part of the HTML.
Publish the changes and then visit the site to confirm the button works.
2. You can add a Reservations button to the top menu.
To do this, go to the Appearance menu and click on Customize. (You can also do this from Settings > Menus in the WordPress dashboard.)
Go to Menus > Primary Menu.
Click on the Add Items button to add your new Reservations page to the top menu.
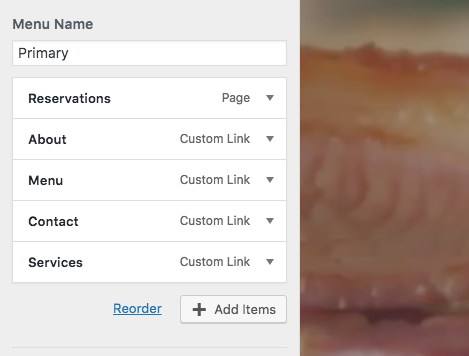
If you don’t like where the page appears in the menu order, just drag it to a different spot.
Publish the changes and then confirm everything looks and works as you want it to on the site.
Wrapping Up
If your restaurant clients are tired of losing out on reservations because they have little control over who finds them on third-party sites, adding restaurant bookings to their WordPress site is the best thing you can do for them right now. Setup is easy. The interface is simple. And it will give them total control over their reservation system.



7 comments
I enjoy articles like these, thank you very much! IMHO Elegant Themes are second to none in this respect, and having changed from Divi to Astra for several reasons, I would love to have a lot more of these useful articles with Astra related design tips and blog articles of all kinds on how to use the Astra theme for different purposes. Keep them coming, thank you! Go Astra!
Great info here. Thanks for the article.
Great info. Cogratulations
Great post! I like it
Thanks!
Very useful post. Because it shows me how to optimize sites within the restaurant industry. Also, I hope you will continue writing posts like this explaining how to make the most of Starter Templates. Thanks:)
Thank you for your kind words! We will certainly continue sharing tips like this. 🙂
It’s very useful & helpful this teaches me how to work on a such customers’ sites. Please share also about Tourism and Travel Sites?